Wiring a 3-Way Light Switch: A Step-by-Step Guide for Your Home
Jan
Introduction
Wiring a 3-way light switch might seem daunting, but it’s a task that you can accomplish with the right tools and a bit of patience. This type of switch is commonly used in hallways, stairs, and rooms with multiple entry points, allowing you to control a light source from two different locations. In this blog post, we’ll guide you through the process of wiring a 3-way light switch, ensuring safety and efficiency.
What You Need
- Two 3-way switches
- Wire (typically three different colors for hot, neutral, and ground)
- Wire nuts
- Screwdriver
- Voltage tester
- Safety gear (gloves, goggles)
Understanding the Basics
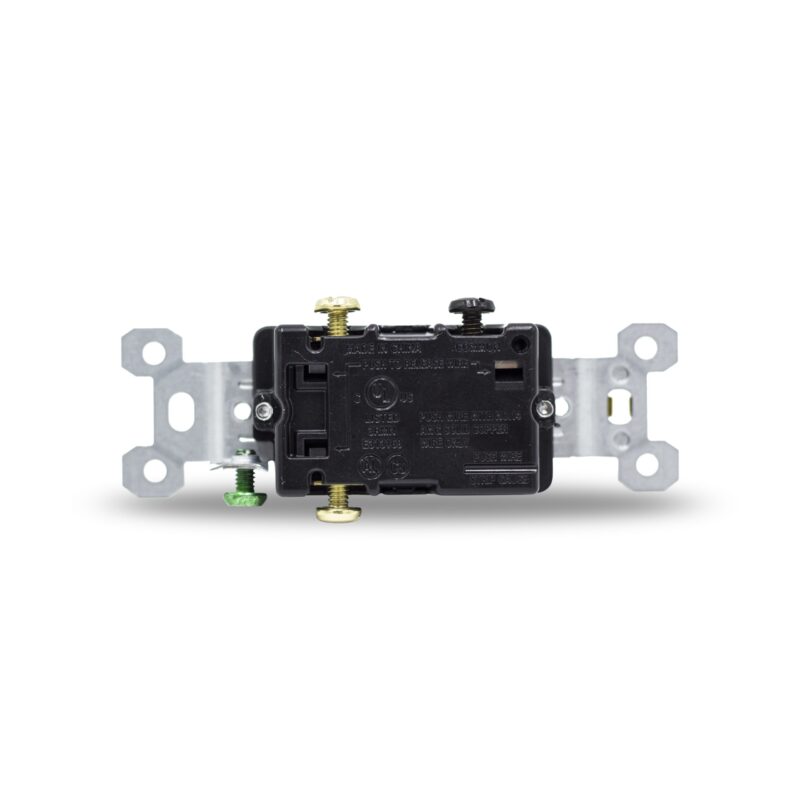
Before we begin, it’s crucial to understand the wiring setup of a 3-way switch. The switch consists of three terminals: one common (usually colored differently) and two brass terminals. The hot wire (from the power source) connects to the common terminal of one switch, and the light fixture’s hot wire connects to the common terminal of the other switch. Two traveler wires connect the brass terminals of both switches, allowing the flow of electricity through either path.
Step 1: Turn Off Power
Safety first! Ensure the power is off at the breaker box to avoid any electrical hazards. Use a voltage tester to confirm that there is no power flowing to the switches.
Step 2: Remove Old Switch (If Applicable)
If replacing an existing switch, carefully remove the switch plate and unscrew the switch from the box. Detach the wires from the old switch.
Step 3: Connect the Wires
- First Switch (Power Source Side): Connect the hot wire (usually black) from the power source to the common terminal of the switch. Then, attach the two traveler wires (usually red and black) to the brass terminals.
- Second Switch (Light Fixture Side): Connect the hot wire (usually black) that leads to the light fixture to the common terminal. Attach the other ends of the two traveler wires to the brass terminals.
Step 4: Grounding the Switches
Connect the ground wire (usually green or bare copper) from the power source to the ground terminal of the first switch, and do the same with the ground wire from the light fixture to the second switch. If your box is metal, also connect a ground wire to the box.
Step 5: Secure the Switches and Test
Carefully place the switches back into their boxes and secure them with screws. Attach the switch plates. Turn the power back on and test the switches to ensure they work correctly from both locations.
Conclusion
Wiring a 3-way light switch is a rewarding DIY project that enhances the functionality and flexibility of your home’s lighting. Always prioritize safety and double-check connections. If you’re unsure or uncomfortable with any step, consulting a professional electrician is advised.
Tips for Success
- Label your wires before disconnecting the old switch for easier reconnection.
- Use a voltage tester to double-check that there is no power before working on the switches.
- Ensure
all wire connections are secure and covered with wire nuts to prevent any electrical hazards.
Troubleshooting Common Issues
- If the switches aren’t working as expected, check to ensure that the traveler wires are connected correctly.
- Ensure the common terminal and traveler terminals are not mixed up during connection.
- Double-check that the grounding is done properly, as improper grounding can lead to malfunctioning.
Enhancing Your Home’s Electrical Safety
While working on your electrical system, it’s a great opportunity to check for any other potential electrical hazards or outdated wiring in your home. Regular maintenance and checks keep your home safe and functional.
Final Thoughts
Wiring a 3-way light switch is a straightforward process that can significantly improve the convenience and functionality of your home lighting system. With the right tools and safety precautions, you can successfully complete this project and enjoy the benefits of having versatile lighting control in your home.